Showing posts with label home cheese-making. Show all posts

Wednesday, 3 April 2013

Bloomy Robiola - A Bloomin' Delicious, Low-Faff Cheese

I happened upon Bloomy Robiola by accident.  And what a delicious accident it turned out to be!
On the day I made it, Camembert was the original plan, but strangely my Penicilium Candidum was MIA.  Not sure how a cheese culture can go missing from the freezer, but somehow, it did.  So I flipped through my trusty cheese-making book for another bloomy rind cheese that didn't require my AWOL cheese bacteria.
Bloomy Robiola - Ready to Eat!
Bloomy Robiola was relatively low-maintenance to make in that it required only a few hands-on steps and otherwise seemed to like being left alone for long periods of time.  Critically, it doesn't need Penicilium Candidum - only a meso starter culture plus Geotrichum Candidum. Unlike a lot of other recipes, for this one, you add both the starter and secondary cultures at the same time and immediately follow with rennet (rather than allowing the milk to ripen before renneting).  It also doesn't require cutting of the curds.  The affinage, or ageing, process was also pleasantly straight-forward.

Beyond the fact that this cheese recipe seems to have fewer steps than most (so less can go wrong), another contributing factor that could have made this cheese such a success is a good tip from Andy (a very advanced and far-more-hardcore home-cheesemaker and blogger (http://handyface.wordpress.com/)).   He advised me try using less culture than I was previously using.  The recipes in my book all seem to call for anywhere from a fourth to an eighth teaspoon for roughly 9 litres - and I wondered if this was too much.  Since the general cheese-making guidance is to use as little culture as possible, I was happy to try Andy's tip of using just a pinch instead - especially for 4-5 litres of milk.

Here's what I did (slightly tweaked from original recipe)

Ingredients:
4.5 litres milk (used Jersey Gold Top)
A pinch of MM100 mesophilic starter culture
A pinch of Geotrichum Candidum
1/8 t calcium chloride diluted in 1/4 cup filtered water
3 drops rennet diluted in 1/4 cup filtered water
Flake Salt


- Slowly heat milk to 35C (95F) - I turn my kitchen sink into a water bath which speeds up this process and makes it easier to  maintain temperatures over long periods of time


- Once at 35C, sprinkle the MM100 and Geotrichum Candidum over the milk. Let stand for 5 minutes while it rehydrates.
- Mix well
- Add Calcium Chloride (in diluted water) - stir
- Add rennet (in diluted water) - stir.


- Cover, and maintain temp at 35C for 12-18 hours or until curds give a clean break (mine seemed to give a clean break much sooner - within maybe 5 hours).


- Place a draining rack over a tray with a cheese mat on top.  Place Camembert molds on the mat.  With a slotted spoon or ladle, gently place curds into molds.
- Let drain at room temp for 8-10 hours.
- Sprinkle flake salt over top of each cheese (still in molds)
- Leave them for 10-12 hours
- Unmold cheeses and flip, sprinkle salt on  top of each cheese and leave to drain for 2 more hours.
- Place cheeses on a cheese mat in a ripening box, place a wet paper towel in with them to give it 90-95% humidity.
- Ripen at 25C (77F) for 2 days (I put mine relatively close to the radiator)
- Every 8 hours (ish) - lift the lid to give air circulation
- After 2 days (or once the whey has stopped draining), place in fridge at 10-12C (50-55F) - maintaining humidity

- Flip cheeses daily, wipe away any moisture within the box
- After 5 days, white mold on surface will start to appear
- Cheese is ready in 3-4 weeks when center of cheese starts to feel soft.

The resulting cheese was really quite good - both texture and taste!  My biased husband said it's the best one yet which is quite promising.  Best compliment of all was hearing a friend say: I would buy this! (Admittedly, she's pretty biased as well, but hey.)

Given how laid-back this cheese is in both the making and the ageing, I reckon it will become a regular on cheese-making weekends.  I never did find that Penicilium Candidum in the end - but I'm glad it went missing so I could happen upon this delectable cheese.

Tuesday, 26 March 2013

If Cheese Could Talk

My success rate for homemade cheese is about 20-30%.  For every good one I manage to make (and age, since that seems to be my downfall), there's another 3-4 bad ones.  The trouble is, often it's not until you've aged the cheese for many weeks or even months that you find out it's all gone horribly wrong.  And even then, the cheese stays silent as to what went wrong in the process.

Was it something I did while I was making you? Too much culture?  Too little heat?  Or was I neglectful when you were ageing?  Too dry or too humid?  Put me out of my misery and just say something!!

The good news is, there are some good self-help guides I can go to on the web that often shed some light on the most likely reasons for the inedible results.  And while some cheeses that have fallen to the waste bin will remain forever a mystery, others have helped me along on my cheese-making adventures to hopefully do better on the next ones.

So here's to all my failures (many more not pictured):

Top Left: Dill Havarti - texture was drier than it should be and it was way too salty.  Kind family and friends still ate it.  I love them.
What I Learned: Don't overdo it on the brine solution or leave the cheese brining for too long.
Top Right: Rosemary Cheddar (Bandaged at this stage) - super dry.  I think I didn't age long enough and didn't give it enough humidity.  The bandaging still is a puzzle to me - lots of black mold was growing on the outside which freaked me out so I just pulled it all off and cracked into early, for fear the mold was growing on the inside (it wasn't).
Learning: I guess the bandaging was working and I should have trusted it - but more humidity next time, so keep it in its own ageing box (these cheeses are sure high maintenance!!)
Bottom Left: Gouda - the texture was more like parmesan when we cracked into early (maybe a little over 2 months old). Taste was far too mild for an aged gouda.
Learning: More humidity so it's not so dry too early.
Bottom Right: Trappist Cheese - this one was actually quite tasty. Texture and taste were everyone's favourite.  BUT, the recipe had coriander seeds in the middle section of the cheese and this caused blue mold because the seeds left air pockets.
Learning: Next time, leave the seeds out.


Given the Trappist Cheese was the winner, I decided a nice confidence boost was in order.  Go with one you KNOW will work.. So I made it again, sans coriander seeds.  From the picture (right), it actually looks quite nice.  Then you taste it and it was DIS.GUST.ING.  What went wrong on this one still remains unsolved.


Awhhh. And Alas, R.I.P first-attempt at blue cheese.  Was looking good after a few weeks... Smelled like blue, looked like some nice blue veins.  But I think I left about 2 weeks too long ageing and in too humid conditions. What results is a stinky (not in a good way) cheese with greyish veins running through.
Learning: Don't go away on holiday assuming these cheeses will happily age themselves gracefully.  Contrary to popular belief, this is not the case.


**All my recipes came from Artisan Cheese Making at Home by Mary Karlin.  I've really enjoyed a lot of her recipes and she explains things very simply.  (Despite their simplicity, it seems there's still plenty of room for error!)

Friday, 30 November 2012

Cheese-Making Course at Abbey Home Farm

While learning how to make cheese through books and online forums (and good ole trial and error) has yielded some positive results, there's nothing quite like having hands-on training with an experienced cheesemaker.  This is why I was ecstatic for November 24th to finally arrive - a long-awaited birthday gift from friends (given to me back in May) meant that I was spending the day in Cirencester at a beautiful farm, learning from a pro.

We arrived around 9am and enjoyed walking round the well-presented organic food shop - full of fresh fruits and veggies picked from the farm.  We had a coffee in the cafe and met Clive, the award-winning-yet-incredibly-humble cheesemaker who would be our teacher for the day.

How Now!!!!
Follow me! He said - and so we took a rambling walk through Abbey Home Farm, passing some friendly cows on our way.  We followed Clive to where the magic happens - a cheese-making facility full of large-scale cheese gadgets - and instantly my list for Santa was filled with ideas!  

Once there, we put on some science-lab looking jackets and sexy smurf shoe covers.  Note to self: Must look into obtaining similar garb at home to increase quality (and success rate) of my cheese.
The class was great for beginners as well as people, like me, who may have done some dabbling in the kitchen before.  Clive was excellent at explaining things very simply, but then was quite happy to field the 20-30 questions fired at him by me and my fellow classmates in our childlike curiosity of all things cheese.

Our sage , Clive
We warmed milk, added the special secret blend of cultures (not so secret in the end as Clive did share with us the list of cultures it includes), and let it stand for a while.  With time to kill, Clive offered us a tasting of all the cheese he makes - oh, go on then!  One of the cheeses was Dancys Fancy - his award-winning soft-cheese.  Instantly a favourite, it was welcome news to find out this was the cheese we were making today (assuming we were suitable pupils).  


We next warmed the milk again slightly and added the rennet to ripen the cheese.  Since we had more time to wait while the curds separated from the whey, Clive showed us how to make butter.  As an aside - butter making was quite interesting to watch as the cream transformed - at one point looking very similar to scrambled eggs.  We each had a go at shaping some butter using the grooved butter paddles.  (Dropped my butter once which was only 1 more time than anyone else.)


After butters were shaped and stored in the refrigerator (until the end of the course when we could take them home), we checked on the cheese which was ready to be cut.  We cut our curds, let them rest for just a bit, gently stirred them with our hands,and then it was time to place the curds into moulds where they will reside until the cheese is ready to be eaten!

    
We headed in for lunch - made by the organic cafe. It was a hearty vegetarian meal with a large side of Q&A with Clive - he sure had plenty of patience dealing with my many questions.  He also showed us where the cheeses are stored and gave us a taste of a few cheddars in different stages of ageing. It was really interesting to compare the mild, simple taste of a 3-month old cheddar with a nearly-ready, strong 16-month old cheddar.

We visited our cheeses, now in moulds, once more to bid them farewell and wish them good luck in the ageing process (which I've been told is where a lot of things go wrong).  Clive will look after them until they are ready to be eaten at which point he'll send them to us!  With any luck, they'll be ready (and more importantly, tasty) just before Christmas...

Monday, 27 August 2012

How TO make Homemade Halloumi

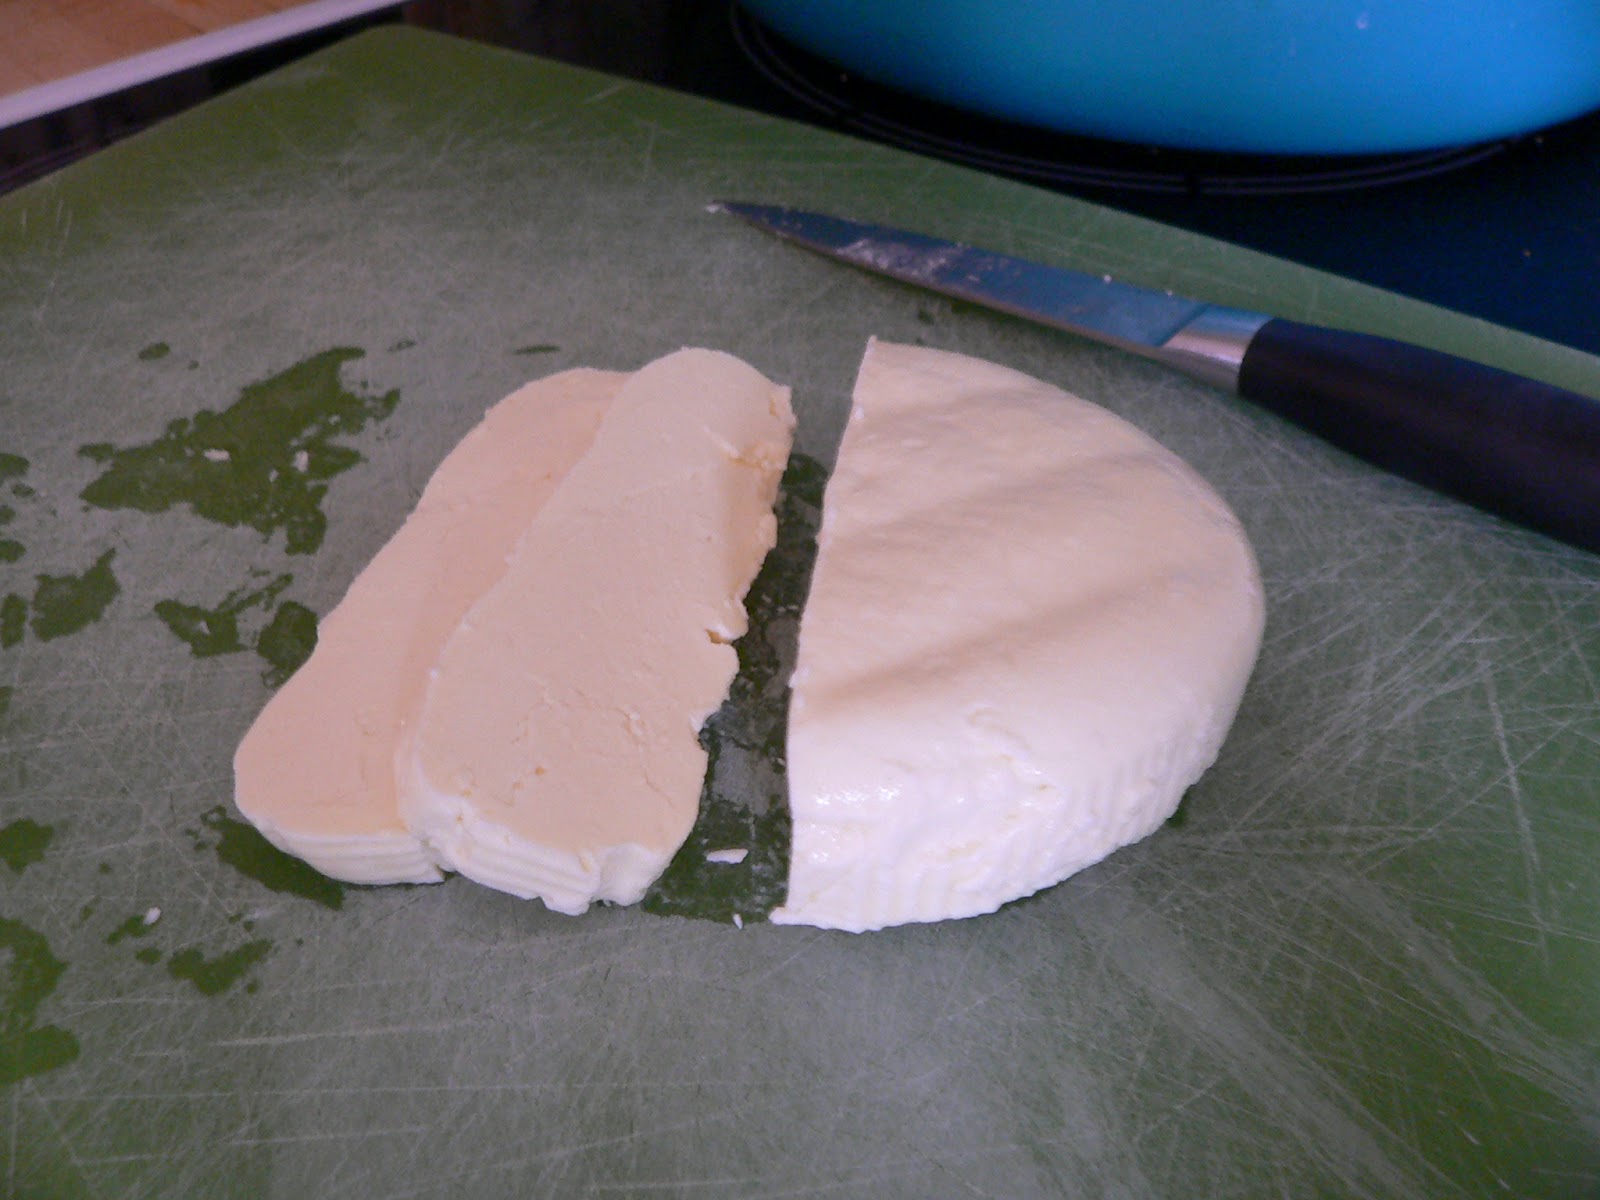
Bliss - utter bliss!  I've conquered halloumi... finally!  Over the weekend, I gave halloumi yet another attempt - my fifth.  While a few other attempts looked pretty good and tasted nice - I wasn't going to call it success until I had the texture right - that well-known, squeaks in the mouth, stays solid on the grill, rubbery goodness that is halloumi.  Thankfully, this time I nailed it - phew.

What made the difference this time? - THE MILK!!!!  Previously, I'd been working with organic semi-skim milk + some double cream - but the milk I was using was homogenised.  This time, I bought pasteurised but unhomogenised milk, Jersey Gold Top.  I'll likely order some unpasteurised milk in coming weeks - but the best you can find in supermarkets is pasteurised/unhomogenised... still a major step up from homogenised milk.

So here's what worked for me:

Ingredients (easy enough to double it - I start small when it's a first-try.. or fifth):
1 litre Milk (unhomogenised)
8 drops or 1/8 tspn Rennet (I used generic liquid animal rennet)
Bottled water or boiled/cooled water (non-chlorinated water)
Salt (flake if you have it)
and Tenacity (in my case)
Supplies (all thoroughly clean):
Saucepan
Dairy thermometer
Strainer
Bowl for under strainer
Cheese cloth or butter muslin

Slowly heat milk to 90F (32C).  (Should take around 20 minutes.)
Dilute rennet (combine with 1/4 cup non-chlorinated water) and add to milk.
With slotted spoon, mix milk and rennet together with an up-and-down motion for 1 minute to make sure it's fully distributed.
Cover and maintain the 90F (32C) for the next 30-45 minutes... I covered saucepan with a towel which helped keep heat in.. and then had to turn the heat on and off throughout to make sure it stayed at this temperature.

Now cut the curds into 2cm pieces... likely the curds are longer than 2cm deep, so you can also run a spoon horizontally through the curds as well.
Let the curds stand for 5 minutes after cutting them.
Now, slowly bring heat up to 104F (40C) - takes about 15 minutes.

Maintain this temperature and slowly stir the curds.. They should firm up a bit and will turn into their own shapes.  Cook for a further 20 minutes at this temperature, continuing to lightly stir.

Time to strain - Place a strainer on top of a bowl to catch the whey.  Place a butter muslin or cheese cloth on top of the strainer.  With a slotted spoon, scoop up the curds and place them onto the cloth.  Reserve the whey in the saucepan as you'll need it in 2 hours.  Whey will continue to drain  from curds for 15 minutes.


Now place the tops of the cheese cloth over the cheese and place something heavy over the curds... You can place the weight on the curds as they sit in the strainer, or you can move the curds and cloth to a mold if you'd like to be a little fancy.  My recipe called for 8 pounds of weight - but I don't have a press, so just put a water-filled tupperware on top of the curds for 2 hours... worked fine!


Peel off the cheese cloth and now you have something resembling cheese!!
Next, slice the cheese into pieces - I cut mine into 4 segments (roughly 2 inches by 2 inches).

Slowly heat the whey to 190F (88C) - should take 20 minutes - basically heat it to just before it wants to boil, but try not to let it boil.

When the whey is 190F (88C), drop the cheese pieces into the whey and cook them, gently stirring from time to time.  While maintaining this temperature, cook the cheese for 35-45 minutes.  The cheese should eventually float to the top.

After 35 minutes, remove the cheese from the whey, sprinkle with some flake salt on each side (pat it down so it stays) and air-dry it for 45 minutes, flipping it once.


Eat straight away or store in a brine.  Great raw or grilled.

Make the brine with 50% whey, 50% non-chlorinated water (maybe 300-350ml of each) plus 1 T flake salt.

The halloumi will technically keep for at least a month (if not two)... but more literally, it will be gone in days... num.


Saturday, 25 August 2012

How NOT to Make Homemade Halloumi

4 litres of milk, 4 attempts, and I'm still on a journey to make perfect halloumi.  The good news is: I'm definitely seeing steady improvements each time I give it a go.

Halloumi is a brined, semi-hard cheese from Cyprus.  Cypriots eat it raw or grilled - I remember stuffing myself silly on watermelon and halloumi salad when I used to travel there for work.  Because halloumi has a very high melting point, it's great on the grill - think chorizo & halloumi kebabs, or grilled on its own and put in a salad or on top of a burger.

After successfully making ricotta and queso blanco, I thought I'd try my hand at halloumi.  And while I haven't yet mastered the art of making it, I've learned lots of tips on what NOT to do...  So here goes:

1) First attempt - Do not overheat the milk or the rennet won't work...  Rennet is the coagulant used to separate the curds and whey of the milk.  Overheating kills the enzymes in the rennet and therefore won't coagulate the milk...  
Here's what happens when you add rennet to overheated milk

2) Second Attempt - Once you've heated milk to appropriate 90 F (32 C) and successfully added the rennet, maintain this temperature for the next 30-45 minutes while the milk ripens.... (aka... don't go and do something else while assuming that your old-school stove will simply maintain this perfect temperature rather than BOIL the poor curds despite being on low heat.) -- oops.
Here's what happens when you accidentally boil the milk and rennet

3) Third Attempt - Once the curds have been strained, use a weight heavier than a bottle of Baileys to press the curds...  Despite this one looking and tasting like cheese, it was softer and blander than Halloumi.
 Bottle of Baileys does not equal 8 pounds in weight...

4) Fourth Attempt - Don't over-salt the brine and get a cheese-press to put the right amount of weight on the curds (instead of stacking bricks atop a plastic container which ends up toppling over a few times).  Definite improvements on this 4th try - tasted pretty good, but the texture was still a little too soft and not rubbery like it should be.


Not defeated, I'm still plugging away at this one - hopefully sometime soon I'll post a companion blog entry on How TO make Halloumi...  

If at first you don't succeed...

Sunday, 5 August 2012

Cheese-Making at Home... First up, Ricotta

   Now that I've successfully made my first cheese, I'm asking myself why it's taken me so long to give it a go!  Granted, I've started with ricotta, famously easy and with no requisite fancy ingredients, but still...  For me, my cheese-making journey called up images of Twain's A Tramp Abroad and his hilarious ascent of the Riffelberg - the initial level of intimidation I experienced far outweighed the actual task in the end.  This morning, I woke up and my mind was made up - I was going to make cheese, no matter how trying it might be.


   I headed to the store and picked up gallons of milk, some double cream, and some lemon and vinegar... one way or another, even if it required numerous attempts, I was going to produce cheese today.  I combined the approaches and recipes of a few books and online blogs I'd been reading and am proud to report that making cheese (at least fresh cheese) is not difficult at all and the result is absolutely delicious.

   Milk, from what I can tell, is at the heart of a great cheese - the recommendation is to try to get the freshest you can.  Down the road, I'd love to work with unpasteurized milk; but for now, the only milk I have easy access to is what's stocked at the grocery store (which is pasteurized).  A lot of recipes call for whole milk, but I read online that whole milk hasn't been consistent this year and a recommendation by a cheese-maker was to use semi-skimmed milk in combination with double-cream.  I took this recommendation and it worked really well!

   The ricotta I made is not the true traditional way of making Italian ricotta...  The true Italian way requires whey in combination with milk.  As this was my first cheese to make (and you get whey as a bi-product of cheese-making), I didn't have any whey on hand.  Even still, this ricotta was delicious and I will be making it again.


Ricotta (makes 1 cup or 250 grams)

Ingredients: 
2 cups (500 ml) semi-skimmed milk
1 cup (250 ml) double-cream
3 Tablespoons lemon juice
2 teaspoons sea salt

What else you need:
butter muslin
candy or digital thermometer
plastic slotted spoon
strainer or colander

In a saucepan, slowly heat the milk, cream and 1 teaspoon of salt, stirring occasionally until it gets to 190 F or 88 C.  This should take around 20 minutes.  I started on medium-to-low heat and slowly turned it up to get to the desired temperature.
Take the saucepan off the heat and add the lemon juice.  Give it a slow stir 1-2 times to make sure the lemon juice gets distributed throughout.  Let it stand for 5-10 minutes.  The citric acid in the lemon juice will instantly coagulate the milk - separating the curds from the whey.  

Line a nonreactive strainer (colander) with two sheets of muslin and place over a large nonreactive bowl.  Pour the curds and whey into the strainer.  Let stand for 5 minutes while the majority of the whey drains.  


Now add the last teaspoon of salt to the curds (at this time, you can apparently also add any herbs or spices as well if desired).  Carefully fold the salt through (with hands or plastic spoon) - trying not to break up the curds too much in the process.

Tie two corners of the muslin together and then the other two corners of the muslin together in order to make a draining sack.  Slip a wooden spoon under the knots and find a place to hang it where the whey can continue to drain (the sink is a good option).  You can put a bowl under it if you'd like to save the whey.


Drain for 1 hour if you like the ricotta to be very creamy.. up to 2 hours if you like it to be dryer in texture.
Once finished, you can either place in a bowl and serve immediately (room temperature and just made is when it's at its best) or place in a tupperware.  It should keep for 3 days - but likely will be eaten up well before that!


The ricotta from this recipe is creamy with a hint of lemon - I served on toasted baguette and it went down a treat.  Enjoy!!