Showing posts with label Recipes. Show all posts

Sunday, 24 March 2013

Between Jobs with Heston

There are probably a lot of noble things I could be doing with 1 month off between jobs, but somehow I find most of my time spent in the kitchen - either making and ageing cheese, or trying out new recipes.  What can I say, it's relaxing.. and delicious.

The extra time has given me a chance to dive in even further to Heston's cookbook promising "classic home cooking", Heston Blumenthal at Home.  His fondue worked a treat in the past and wasn't terribly difficult.  But what about some of his other recipes?

I'm still reticent to try, say, his Szechuan Broth with Duck Dumplings, where the recipe begins with: "This has lots of wonderful Asian flavours. It requires a bit of planning and preparation - you need to start at least two days in advance in order to ice-filter the stock..." (Not sure what it says next, as that's when I turned the page.)  But there do seem to be a fair amount of more reasonable feats.

In the last week, I've tried out these three:
Haddock with leek and potato sauce (recipe below - definitely a winner)
Pea & Ham soup (this was good, but not worth all the time required for sieving!)
Crab Lasagne (deserves a separate post, also a winner but a labour of love)

Admittedly, "leek and potato sauce" sounds rather dull, but the taste was nothing short of restaurant-quality goodness.


The sauce was easy to make but tasted very complex.  It takes 30 minutes to make the sauce, +5 minutes to cook the fish - and meanwhile I made a carrot/potato puree and chilli broccoli as sides.  I doubled the sauce so I could freeze half for a future supper - fingers crossed it freezes well!

For leek and potato sauce:
50 g Peeled and finely sliced potato (approx 1 small potato)
10g Unsalted butter
35g Peeled and finely sliced onion 
160g Cleaned and very finely sliced leek (this was about 6 leeks for me, but depends on size)
1 bouquet garni (thyme, celery leaf (I omitted this), parsley, and bay leaf - tied with a string or strip of leek)
200g Fish stock, warmed
10g Whipping cream
10g Whole milk
Salt and white pepper (white pepper instead of black makes a big difference)

For the fish:
Groundnut oil (I used olive oil)
2 Haddock fillets (also could be cod or halibut) - weighing 150-200g each
Chives, tarragon, to garnish

For the leek and potato sauce, rinse the sliced potato under cold running water for 30 seconds, drain well

Melt butter in saucepan over medium heat and cook the onion and potato for 10 minutes, stirring regularly.  Add the leeks and cook for a further 5 minutes.

Add the bouquet garni and warm fish stock and bring to a simmer for 10 minutes or until the potatoes are tender. Remove the bouquet garni and liquidize the sauce before straining it through a sieve into a clean pan.

Add the cream and milk and warm through.  Season with salt and freshly ground white pepper and keep warm.

To cook the fish, heat a thin layer of oil in a frying pan over a medium heat. Season the fish fillets on both sides with salt and place in the pan.  After approximately 2 minutes, flip the fillets over, cook for 2 more minutes and remove from heat,

Place the fillets on warm plates then, using a hand blender, froth the sauce and ladle it around the fish.  Chop the herbs and sprinkle over fish.

And there you have it - a restaurant quality sauce in 30 minutes - exactly what you'd hope to create with a cookbook like this.  Heston also says it would be great on scallops - think he's probably right (he's rarely wrong... unless you count including his Szechuan broth recipe in his "classic home cooking" book.)

Wednesday, 20 February 2013

Bun Bo - Yummo!

I've learned something.  In the match between life and blog, life wins.  I'd threatened self with: "If it's not done in the next two weeks..." - but somehow the fire wasn't hot enough.  As a 1-2 week follow-up from my last post on Hanoi, I'd meant to write a companion post sharing a tried-and-tested recipe for Bun Bo Xao - that delicious dish I first encountered in Hanoi.  Best of intentions, et cetera, et cetera... over a month later, but here is that companion post.

To try and replicate the dish, I went over to a good friend's who has an insatiable appetite for Vietnamese food and a rather handy knack for making it, too!  The good news is that our first attempt at Bun Bo Xao was a smashing success!
Bun Bo Xao is a noodle salad with beef and lots of fresh herbs and veggies.  It's healthy and full of mouth-watering flavour.


I heavily borrowed from Helen's recipe on www.danangcuisine.com but did make some modifications.
Here's how we made it (served 3):

Ingredients:
500g rump steak
4 cloves garlic - finely chopped
1 stalk lemongrass
Herbs (1 small bag of: mint, basil (preferably thai, but normal is fine), coriander) - all roughly chopped
1 carrot, shredded
1/2 cucumber, sliced and halved
1/2 onion (yellow or red), sliced
1.5 T oyster sauce
1/2 t salt
1/2 t pepper
3 T vegetable (or rapeseed) oil
Rice Noodles (enough for everyone to have a large portion)
crushed roasted peanut (2 T per person)
Fried shallot (1 T per person)
4 T Fish Sauce
4 T sugar (regular or cane)
1 Lime
1 Small red chilli pepper (or more if desired)


1. Slice the rump steak very thinly and against the grain (Helen's suggestion as she says it keeps it tender)
2. Place the meat in a bowl and add 1/2 the chopped garlic, the lemongrass, 1 T oil, the oyster sauce, pepper, salt.  Mix well and let marinate for 20 minutes or more.
3. Meanwhile, prepare other ingredients and place in bowls or on a plate.
4. Heat 2 T oil in pan till hot - add one chopped clove of garlic and the onion.  Cook for 1 minute and then add beef.  Cook until brown all over - we left it pink on the inside.
5. Cook noodles per package instructions.
6. Prepare the salad dressing (Nuoc Cham) to be drizzled on top of the dish:  Mix 2T fish sauce, 2T sugar, 10T water (proportion always 1:1:5).  Then add final chopped garlic clove, chopped chilli, and juice of one lime
7. Once everything is ready, place everything on the table for people to build their own Bun Bo.  I placed a hearty portion of noodles at the bottom, then added fresh herbs, shredded carrot and sliced cucumber.. then the onion and beef.. and topped with crushed peanuts, fried shallots, and a few tablespoons of Nuoc Cham.

The result was delicious and took me right back to that bia hoi where I first enjoyed Bun Bo in Hanoi.
There is a fair bit of preparation for this dish, but it's very very simple to make and will, no doubt, be a regular in our kitchen from now on.

Ăn ngon miệng! (Enjoy!)

Thursday, 6 September 2012

Homemade Pasta - For the inner Italian in all of us

Homemade pasta - sounds like a lot of effort but it's not!  Similar to bread-making, the main thing you need is some extra time.  It's not the kind of thing you're likely to whip up midweek after work.  However, it's equally not something that requires slaving away - the hands-on time is altogether around 30-35 minutes.

Now, I know there are some fancier recipes out there, but this one is easy to remember and hasn't failed me yet:
Ingredients/Supplies:
Tipo 00 Flour
Eggs (the fresher the better)
Pasta Machine (for rolling out, shaping pasta)

Ratio of 100g flour to 1 egg.
Make 100g per person plus 1 extra ratio of 100g flour/1 egg.  So if you are serving 4, use 500g flour and 5 eggs.

In a bowl, pour in flour and then make a well in the middle.  Crack the eggs into the well.
With a fork, whisk the eggs so that the yolks and whites blend together - you can take in some of the flour as you do this.  Once the eggs are fully whisked, use your hands to mix the flour and eggs together.  It might be a little sticky to work with until all of the flour gets worked in.

Once you've formed it into a ball, place it on a lightly floured service and knead it.  
I recall one of Jamie Oliver's books saying 3 minutes would do the trick - maybe if you have the world's strongest hands to knead the dough... For anyone with just average strength, the kneading process is more likely to take 6-10 minutes.  If you've made pizza dough, you'll know how the dough eventually changes in texture to something more smooth and elastic... it's the same for pasta dough... keep kneading until you get to that smooth, elastic feeling.  When you're there, wrap the dough in plastic wrap and put in the refrigerator for 1 hour.

Now the fun begins!  I have an imperia pasta machine (around £60 from Amazon) - it makes the job of rolling out the pasta super easy and fun.  When my nieces and nephews come for a visit - they enjoy joining in on this part... So it's also a great way to include kids in the process.

Take the dough from the fridge.  You will be working with it in batches - dividing it into the same number of people you plan to serve.  Take one portion and leave the rest wrapped in plastic and in the fridge. On a lightly floured surface, roll the dough to be roughly 1/2 inch thick with a width of roughly 4 inches.  

You will now knead this piece of dough using the machine.  You won't need the attachment which makes tagliatelle or spaghetti - just the main part of the machine is needed.  Put the machine on the widest setting and run the dough through it.  Fold the dough over itself (end to end) and run it through this setting again.  Then change the setting to 4 or 5 and run the dough through this setting.  Move back to the biggest setting, fold the dough over itself and run it through again.  [If you want, you can at this stage sprinkle some black pepper or dried herbs on the pasta before folding it over itself.]  Keep on going back and forth between the larger setting and the slightly more narrow setting - remembering to fold the dough back over itself before putting it through the larger setting.. Repeat this 6 times... by then the dough is very smooth.  The final step is to put the machine on setting 2 and run the dough through it.


Since I wanted to make papardelle, I next took the long, wide sheet of pasta over to the lightly floured cutting board... Lightly dust the pasta sheet and then widely fold the sheet like an accordion.  Now you can cut the pasta - roughly an inch wide or to your liking.  Lastly, hang each piece of papardelle on a drying rack until ready to use.  It's always best to use it immediately after making but is fine to dry out (If you leave it to dry for a long while, I put a moist paper towel on the drying rack or the pasta will break at the points where its hanging when you later try and remove it.)

Boil the pasta for a little over 2 minutes (3 minutes is overcooked in my opinion).
With homemade pasta, the sauce you make to accompany it doesn't need to take too much time or effort - as the pasta itself is the showstopper!  This past Friday night, I made pappardelle and cooked a simple chicken and gorgonzola cream sauce with chives to accompany it...  but I could have been just as happy having it with some nice olive oil and a bit of grated parmesan.


 No matter what kind of sauce it's served with, homemade pasta stands out - the freshness and the "bite" in it really make it well worth the extra time required.  And every time I make it, I think: why don't I make this more often!?

Bon Appetito!


Sunday, 5 August 2012

Cheese-Making at Home... First up, Ricotta

   Now that I've successfully made my first cheese, I'm asking myself why it's taken me so long to give it a go!  Granted, I've started with ricotta, famously easy and with no requisite fancy ingredients, but still...  For me, my cheese-making journey called up images of Twain's A Tramp Abroad and his hilarious ascent of the Riffelberg - the initial level of intimidation I experienced far outweighed the actual task in the end.  This morning, I woke up and my mind was made up - I was going to make cheese, no matter how trying it might be.


   I headed to the store and picked up gallons of milk, some double cream, and some lemon and vinegar... one way or another, even if it required numerous attempts, I was going to produce cheese today.  I combined the approaches and recipes of a few books and online blogs I'd been reading and am proud to report that making cheese (at least fresh cheese) is not difficult at all and the result is absolutely delicious.

   Milk, from what I can tell, is at the heart of a great cheese - the recommendation is to try to get the freshest you can.  Down the road, I'd love to work with unpasteurized milk; but for now, the only milk I have easy access to is what's stocked at the grocery store (which is pasteurized).  A lot of recipes call for whole milk, but I read online that whole milk hasn't been consistent this year and a recommendation by a cheese-maker was to use semi-skimmed milk in combination with double-cream.  I took this recommendation and it worked really well!

   The ricotta I made is not the true traditional way of making Italian ricotta...  The true Italian way requires whey in combination with milk.  As this was my first cheese to make (and you get whey as a bi-product of cheese-making), I didn't have any whey on hand.  Even still, this ricotta was delicious and I will be making it again.


Ricotta (makes 1 cup or 250 grams)

Ingredients: 
2 cups (500 ml) semi-skimmed milk
1 cup (250 ml) double-cream
3 Tablespoons lemon juice
2 teaspoons sea salt

What else you need:
butter muslin
candy or digital thermometer
plastic slotted spoon
strainer or colander

In a saucepan, slowly heat the milk, cream and 1 teaspoon of salt, stirring occasionally until it gets to 190 F or 88 C.  This should take around 20 minutes.  I started on medium-to-low heat and slowly turned it up to get to the desired temperature.
Take the saucepan off the heat and add the lemon juice.  Give it a slow stir 1-2 times to make sure the lemon juice gets distributed throughout.  Let it stand for 5-10 minutes.  The citric acid in the lemon juice will instantly coagulate the milk - separating the curds from the whey.  

Line a nonreactive strainer (colander) with two sheets of muslin and place over a large nonreactive bowl.  Pour the curds and whey into the strainer.  Let stand for 5 minutes while the majority of the whey drains.  


Now add the last teaspoon of salt to the curds (at this time, you can apparently also add any herbs or spices as well if desired).  Carefully fold the salt through (with hands or plastic spoon) - trying not to break up the curds too much in the process.

Tie two corners of the muslin together and then the other two corners of the muslin together in order to make a draining sack.  Slip a wooden spoon under the knots and find a place to hang it where the whey can continue to drain (the sink is a good option).  You can put a bowl under it if you'd like to save the whey.


Drain for 1 hour if you like the ricotta to be very creamy.. up to 2 hours if you like it to be dryer in texture.
Once finished, you can either place in a bowl and serve immediately (room temperature and just made is when it's at its best) or place in a tupperware.  It should keep for 3 days - but likely will be eaten up well before that!


The ricotta from this recipe is creamy with a hint of lemon - I served on toasted baguette and it went down a treat.  Enjoy!!

Monday, 9 July 2012

Baby Steps with Heston

Last Autumn, some good friends had us round to their place for dinner.  This wasn't just any dinner - this was a triumphant feat of endurance and tenacity... and more to the point, 9 hours of cooking (!!!).  Heston's spagbol - the taste, the texture, the aroma - is now cemented into my taste buds' subconscious... it was one of those memorable meals that will continue to make my mouth water with even the slightest recollection of it.  And I'm afraid no other spaghetti bolognese will do now (with a genuine apology to my mother who will likely read this at some stage).

I've always enjoyed Heston's tv shows and all the geeky experiments and exploratory journeys he takes for the sake of good eating - but 9 hours seems a little overkill if it's me in the kitchen.  This is why I was a bit reticent upon receiving my very first Heston cookbook, Heston Blumenthal at home...  I'd happily go for a Heston meal cooked by someone else, but wasn't sure I was ready to commit to the apparent toils that come with producing such paradisiac pièces de résistance.

 I decided to start with theory, slowly marinating in the scientific explanations of how and why recipes work.  And while I'm still intimidated by the daunting prospect of making stock the Heston way, which seems like it could take days, I've been pleasantly surprised to also find some recipes that not only seem manageable, but also look (and that is the operative word) like they will take less than 9 hours - in some cases, considerably less.

And so, I began my first practical examination of this book over the weekend.  Two things drove my choice in recipe - time and an undeniable craving for cheese.  Inspired around 5:30pm on Saturday evening to attempt a Heston recipe, it was very easy to choose based on the length of the recipe.  And when I flipped to page 231, Cheese fondue with sherry and cloves, the way forward became perfectly clear... especially as we'd only just received a fondue set as a wedding gift last week.

Heston's recipe for fondue was very clear, easy to follow, and thankfully took perhaps 45 minutes in total to make.  Here's the recipe:

Serves 6-8
450g Gruyère cheese, grated
450g Comté cheese, grated
15g Cornflour
30g Manzanilla sherry
2 Sprigs of thyme
3 Cloves garlic
500g Dry white wine
20g Lemon juice
5g English mustard
pinch of ground cloves

In a bowl, mix the grated cheeses with the cornflour.

Bring the sherry to a simmer in a small saucepan over a medium-high heat. Add the thyme and garlic, remove from the heat and leave to infuse for 10 minutes. Strain and allow to cool.

Bring the wine and lemon juice to the boil together in a medium saucepan, and add the cheese, a handful at a time, whisking continuously until smooth and creamy.

Add the sherry, mustard powder and ground cloves to the cheese and wine, and continue to stir until the fondue thickens.

Transfer to a fondue pot and serve (with whatever you like - we had bread, green apples, red pepper, and zucchini)

The fondue was delicious - though I couldn't necessarily taste the mustard, the sherry, or the cloves coming through - however, they definitely added complexity to the fondue which I suppose is the desired effect - a harmonious flavour without any one part overwhelming the whole.


It took some time for the fondue to thicken - so it's useful to note that the last step, before transferring to the fondue pot, can take upwards of 15-20 minutes to get the consistency Heston talks about in his intro to the recipe... "You want the cheese to be runny and stringy, not thick and stodgy."  Mission accomplished!!  Maybe this Heston stuff isn't so daunting after all.... though I think I'll shelve the stocks section for the time being....

Saturday, 17 March 2012

Naples - birthplace of pizza

Ah Naples - a city forever linked with pizza, slicked up sunglass-clad Italian stallions, a sordid mafia undercurrent, and perilous driving... nevermind the near 3000 year greco-roman history.  But back to the pizza...

My sister and I arrived fairly late in the evening to Naples to begin our exploration of the Campania region - a tour heavily influenced by food, happily taking 100-mile detours just to seek out the best gelato in one town or an incredible smoked ricotta which was a speciality of another.  As we planned to promptly leave Naples the very next day in search of all this wonderful food, it was our top priority to seek out a proper Napoli pizza that evening.  We headed to Pizzeria Brandi, which claims to be the inventor of the original Pizza Margherita.  We shared some mozarella di bufalo which was creamier and saltier (and far tastier) than any I'd tasted before (though I guess this should be expected since Campania is home of mozarella di bufalo, along with many other amazing cheeses!).  The pizzas had a lovely crisp crust and fresh ingredients.  What I noticed most was that it was much lighter than pizzas I'd had elsewhere in Europe and the US - you come away feeling nicely full without that heaviness that comes with more processed doughs and greasier toppings.

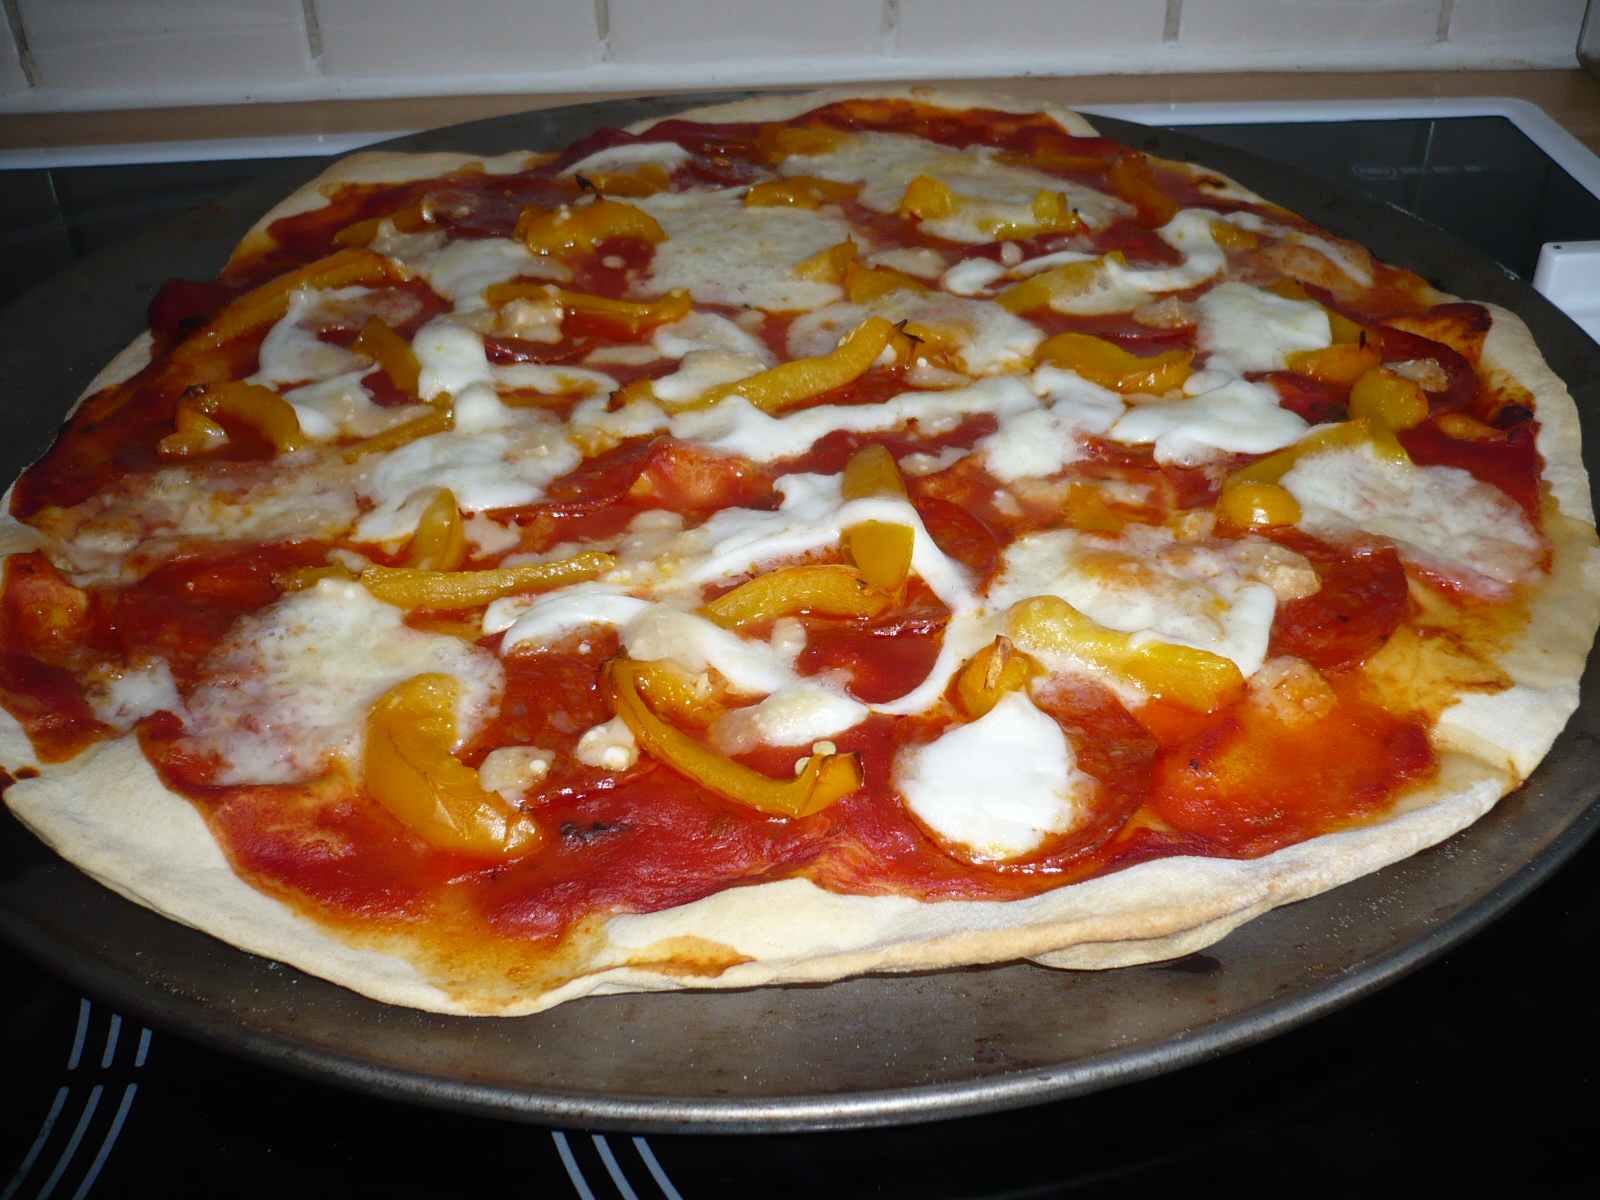
And thus began my love affair with homemade pizza - aiming to bring a little bit of Naples to my very own kitchen table.  Homemade pizza night happens roughly once a month now - and while the toppings continue to vary, I never mess with the dough recipe which consistently gives a crispy, airy and delicious base.  As much as toppings influence the flavour and tasty-goodness of a pizza, the crust is really what gives it that homemade taste...


The recipe comes from Silvana Franco's recipe book aptly called, Pizza.

And here is the recipe I've used, probably over one hundred times...
(The recipe in the book recommends regular unbleached all-purpose flour, but I've since switched to Tipo 00 - an Italian flour especially for pasta or pizza dough - it makes kneading a lot easier!)

Basic Pizza Dough

1 and 2/3 cups (225 grams) Tipo 00 Flour (or all purpose, if Tipo 00 is not available) plus a little extra for kneading
1/2 teaspoon salt
1 pack dry yeast (1 and 3/4 teaspoon)
2 tablespoons olive oil
1/2 cup (140 ml) tepid water

Put the flour, salt and yeast in a large bowl and mix. Make a well in the center.  Add the oil and water to the well and gradually work in the flour to make a soft dough.  Sprinkle with a little flour if the mixture feels too sticky, but make sure it is not too dry: the dough should be pliable and smooth.

Transfer the dough onto a lightly floured work surface.  Knead for 10 minutes (make sure you stick to the 10 minutes - it will make a difference if you knead it for less time), sprinkling with flour when needed, until dough is smooth and elastic.

Rub some oil over the surface of the dough and return the dough to the bowl. Cover with a clean cloth and leave for about 1 hour until dough has doubled in size (again, best not to skimp on time - and hour or more is best).

Pre-heat Oven to 190C Fan or 400F
Remove the dough to a lightly floured surface and knead for 2 minutes, until excess air is knocked out.

At this stage I split the dough into two balls and roll out each one separately.
Once you roll one out, give it some stabs with a fork then place on a baking tray or pre-heated baking stone.
Pop them in the over for 8-10 minutes or when it has some big air pockets and some golden brown colour to it.

Put whatever toppings you like on it and then bake for an additional 10 minutes or more (it's ready when cheese is bubbling and crust is golden).

Monday, 5 March 2012

A Delicious, Hearty Soup... and there's no fat!

Every time I make this soup, I think of my sister Wendy.  She gave me this recipe (not sure where she got it) many years ago and it's now on my list of favourites - making many appearances throughout the winter months.  No matter how many times I've had it, it still always amazes me how filling and hearty the soup is - it has so few ingredients, you just wouldn't think it could be so satisfying.  

My partner has taken to mocking me when he sees this soup in the making.  It seems I've said one-too-many-times what still surprises me when I tuck in.  On his first spoonful, he says: "And, can you believe it, there's no fat!"  Well... it's practically true - with only a tiny splash of oil, there is very little fat yet this tasty soup is rich and buttery in flavour.  So I guess I've been a bit of a broken record about it - I'm not one to really watch how much fat is in what I'm eating - but I usually expect rich-tasting foods to taste rich for a reason (fat)!

Wendy's a wonderful and (therefore) very busy mom - so when she shares a recipe, the great thing about it is it's usually guaranteed to be pretty no-nonsense.  And who doesn't like to have those kinds of recipes??

So here it is:


Butternut Squash and Leek Soup:

2 large butternut squash
1.25 Liter (5 cups) chicken or veggie stock
4 Tablespoons Fresh Ginger, finely chopped or grated
2 large leeks (only need the white parts, finely chopped)
Olive Oil
Salt/Pepper

Slice squash in half, scoop out seeds and icky stuff, place on oiled baking tray (sliced side down), and lightly oil and fork (stab a couple times) outer side of squashes (skin side)

Bake at 180C Fan or 380F until you can easily put fork through (about 30-40 minutes, depending on oven or altitude). Let them cool down before handling.

Meanwhile, finely chop the leeks (only the white parts) and ginger
When the butternut squash is cool enough to handle, scoop out from skin

In large soup pot, put 1-2 tablespoons oil on bottom and heat medium high
Add chopped leeks and ginger and cook until softened (not browned) - around 5 minutesAdd the butternut squash and cook for another 1-2 minutes
Add 1 liter (4 cups) stock
Cook for 20 minutes on medium heat
Turn heat off and puree soup (A wand or hand blender is easiest, straight in the pot - but a blender can be used)
Add 250 ml (1 cup) of chicken stock (if needed, if you like the thickness, you can leave as is)
Stir in  1 teaspoon of salt, pepper to taste
And serve with crusty bread
Enjoy!
... 
.........
..............
And there's no fat!!!

(well, nearly none...)

Saturday, 4 February 2012

The Not So Difficult Dinner Party That Was Still Quite Tasty

Round 2: The next time my sister and I were together was in mid-January 2012 in Singapore.  When she last visited me in the UK, she demanded we throw a Very Difficult Dinner Party for some of my friends (only recipes marked "Very Difficult" Steph!).  However, on my visit to see her in Singapore, she was quite content to take it easier on our recipes of choice for a dinner party for her friends.  Either she didn't think her friends were worth all the fuss, or perhaps behind that tough, I-make-it-all-look-so-simple-exterior, she too was a little broken from our Very Difficult Dinner Party Feat.

Either way, I didn't ask questions.

Our menu was:
Hors d'oeurvres:
Prawn & Lemongrass Lollipops w/ sweet chilli and lime sauce
Pecorino with Truffle Honey (found a version from Australia - good but not as good as the Italian versions)
Ricotta Cigars with a spicy tomato dipping sauce

Starter:
Seared tuna with cucumber salad

Main:
Chicken, lime and coconut parcels (I added chopped lemongrass and ginger to the parcels - and would do it again, dark meat is better for this slow steam-cooking method)

Seared beef with sweet chilli caramel sauce (second time I've had this - continues to be a winner!)


Seared Grilled Asparagus Bundles Wrapped in Prosciutto and Tomato Salad 


The food was, according to my taste buds, just as enjoyable as our very difficult dinner party in the UK - but with about a fifth of the effort. (I'm still haunted by artichokes.) The prawn lollipops, chicken parcels, and caramel beef have all made their way into my recipe binder - ready to be tried out in London.

Saturday, 8 October 2011

The Very Difficult Dinner Party

My sister was in town this weekend.  One of our favourite pastimes is cooking together.  There’s a bit of an untold ritual to it – it begins with magazines and coffee.  More specifically, food magazines (from the piles of Olive, Delicious, Good Food, Donna Hay, and Bon Appetit food magazines) and 3-6 cups of coffee, dependent on how inspired we are by what we see.  This time, my sister tasked us with a challenge: Let’s only cook very difficult things! – the exclamation point reflecting her excitement.  And so, we pored through the magazines, only stopping on recipes labelled “For the confident cook,” “A bit of effort,” or the more direct “Very Difficult.”

3.5 cups of coffee later, we’d settled on a menu for our Very Difficult Dinner Party:

Emmental gougéres (delicious mag, from The Skinny French Kitchen by Harry Eastwood)

Braised artichokes with lemon hazelnut praline, cherry tomato sauce and a chard, potato, and Puy lentil cake (delicious mag, from Irish chef Denis Cotter)

Roquefort soufflé on a salad of watercress, poached pear, and toasted pine nuts (really a combination of recipes we found online)

Poached salmon with pink grapefruit and basil sauce served with asparagus (Good Food, GordonRamsay)

Limoncello Meringue Pie (Olive, from Janine Ratcliffe)


Menu set, it was time for the next part of our ritual – Borough Market, via Gordon’s Wine Bar.  After a leisurely pitstop in Gordon’s for a cheeky afternoon glass of cava, we walked along the southbank to Borough Market.  There, we inhaled the atmosphere – full of tantalizing smells and drool-worthy food sightings – and successfully came away with loads of fruit and veg for our very difficult menu.

Our dinner party wasn’t until the next day, so we enjoyed a relaxing night in, trying our hand at creating some new recipes. 

We embarked on cooking our menu at 3 o’clock the next day, telling guests to arrive anytime from 7pm – and I quickly learned just how inefficient I am in the kitchen, especially compared to my Cordon-Bleu-trained sister.   Here’s how the day went:

3pm – START THE VERY DIFFICULT COOKING, 4 HOURS TIL GUESTS ARRIVE
Me: I’ll start on the artichoke! It says it takes 1.5 hours to make and 1 hour to cook.
Sister: I’ll make the limoncello tart!

 base of the limoncello tart

 
 the journey begins on the artichoke dish, later deemed my kitchen Everest.

4pm – TART CHILLING AND SALAD MADE, 3 HOURS TIL GUESTS ARRIVE
Sister: I’ve made the limoncello tart (except the meringue), poached pears, toasted pine nuts, made a salad dressing – how are you doing Steph?
Me: I’ve peeled one artichoke.
Sister: Do you need any help Steph?
Me: (grumble grumble grumble)
Sister: Do you want me to make the Emmental Gourgeres?
Me: (slightly defeated) Sure. 

 
It's even prettier than the picture in the magazine!!

5pm –  GOUGERES DOUGH MADE, TART COMPLETE, 2 HOURS TIL GUESTS ARRIVE
Sister: So gougeres dough is done, I’ll start on the soufflés!
Me: I've peeled three artichokes. And while I've started on some other parts of the artichoke dish, I've also started to lose the will to live.
Sister: That's nice Steph - keep up the good work!

 Making the praline (with help from sis)
Lemon Hazelnut praline which gets blitzed in food processor and sprinkled onto artichoke dish)
 
(Puy Lentil and Potato mix to be wrapped in cavolo nero, instead of chard)


6pm – SOUFFLES PREP COMPLETE, 1 HOUR TIL GUESTS ARRIVE
Sister: So I’m done with the soufflé prep.  I’ll cook the gougeres and start making the Hollandaise for the salmon if that’s okay? Do you think you can work on anything else besides the artichoke Steph?
Me: The artichoke is very demanding!!  It needs lots of attention.  I’m enslaved. 
Sister: (Just stares at me)
Me: I’ll make the water to poach the salmon and cut up the grapefruit and basil.

6.45pm – I text friends and ask them to be late – “we” are very behind on our very difficult menu

7pm – ARTICHOKES FINALLY IN OVEN ALONG WITH LENTIL CAKES, HOLLANDAISE IN PROGRESS, 30 MINUTES TIL FRIENDS ARRIVE

 
(yep, this is all I have to show for - thankfully it was very tasty)
(yummy roquefort souffle)

7.30pm – EVERYTHING IS FULLY PREPPED/COMPLETED FOR THE NIGHT! (NO THANKS TO ME) – GUESTS ARRIVE

So not quite as smooth as it might have been had I started a little earlier.  Not only did it take me a whopping 4.5 hours to make artichokes, I also missed out on learning how to make the perfect Hollandaise (my sister didn’t even have to look at a recipe – she really sickens me sometimes).  The poached salmon with grapefruit/basil hollandaise was excellent - and really simple if you're only in charge of poaching the salmon.  Somehow I failed to get a picture of this one, but I'd do it again!  The limoncello meringue pie was standout - that recipe has made it into my binder for future use.

Was it all delicious? YES!  Would I make it all again – not on your life! …  especially that artichoke (despite it being very tasty).

Monday, 29 August 2011

London Summer Barbecue

My neighbours may have been a bit puzzled this past Saturday morning, when whiffs of barbecue greeted them at 7.30am.  I suppose it's nearly like waking up to the smell of bacon... nearly.  Thirty minutes before, I was fast at work rubbing two sets of ribs in preparation for an end of Summer party we were having.  The early start was well worth it, as the ribs seemed to get pretty good reviews - the brilliant thing was how easy the recipe was... no faffing around with boiling or homemade marinades, yet the end result is fall-off-the-bone, barbecuey goodness.  The recipe comes from my vegetarian aunt from Michigan:


Baby Back Ribs


1 rack baby-back ribs
1 bottle favorite bbq sauce
salt and pepper
any steak rub


1. Rub ribs with favourite steak/meat rub and salt & pepper, and grill 6-8 minutes per side. (Can stop after this step and wrap ribs in fridge until ready to cook.)
2. Let ribs cool slightly until safe to handle. Cut into individual ribs. Place ribs in a roasting pan and cover with bbq sauce.
3. Bake for 5-6 hours at 110 degrees Celsius (225 degrees F) until falling off the bone.


I also made some salsas, using the ever trusty Salsa Bible - Mark Miller's The Great Salsa Book.


One in particular seemed to be a crowd-pleaser and it's the first salsa I ever made from this book (so also a personal favourite, and brilliantly not much chopping required):


Ingredients:

  • 1 tablespoon olive oil
  • 1/2 onion, peeled and chopped
  • 2 lbs roma (or plum) tomatoes, blackened
  • 4 teaspoons finely minced roasted garlic
  • 1/2 cup minced fresh cilantro leaves
  • 4 chipotle chiles in adobo, chopped
  • 1/4 cup olive oil
  • 1/4 cup red wine vinegar
  • 1 tablespoon salt
  • 1 teaspoon sugar

Directions:


  1. 1
    Heat a tablespoon of oil in a saute pan over medium heat until lightly smoking, add the onion and saute until carmelized, about 10 minutes or so.
  2. 2
    Transfer the onion, half the blackened tomatoes and garlic to a food processor and pulse until finely chopped but not pureed. Add the cilantro and chipotle chiles and pulse again to mix.
  3. 3
    Peel, seed and chop the remaining tomatoes tomatoes and fold in along with the remaining oil, vinegar, salt and sugar.
  4. 4
    Serve chilled or at room temp with chips, red meat or chicken.


Saturday, 27 August 2011

The Grampy Bread

There's something really satisfying about making things with your hands - breads, pastas, doughs.
My grandfather passed away two years ago today and I named this bread after him. The weekend of his funeral was quite tough - knowing that my whole family was there in Michigan and I wasn't.  I found solace in cooking and baking... but for some reason, I only wanted to make things that I had never made before and I chose fairly time-consuming recipes.
One recipe I tried that I have now made many times over is a Carmelised Onion and Thyme Plait, featured in one of Waitrose's free seasonal magazines (back when they had them).

It's actually quite easy to make - it just takes time given that it needs to rise twice.
I make it as an accompaniment to soups or stews, but it would also be nice served up with some cheese.
This bread is now my favourite bread to make, and lovingly renamed after my grandfather: the Grampy bread.


Caramelised Onion and Thyme Plait

Rediscover the pleasure and satisfaction of baking your own bread. Our crisp, crusty plait is simple to make and delicious to eat – especially when served with a hunk of cheese.
  • Nut Free

Preparation time:
40 minutes, plus proving
Cooking time:
40 minutes
Total time:
1 hour 20 minutes, plus proving  

Serves:
 8 - 10

Ingredients

  • 500g strong white bread flour, plus extra for dusting
  • 7g sachet easy-blend dried yeast
  • 1 ½ tsp celery salt
  • 75g Parmigiano Reggiano, grated
  • 7 tbsp olive oil
  • 750g red onions, thinly sliced
  • 2 tsp caster sugar
  • 1/3 pack lemon thyme, plus extra to sprinkle
  • 2 cloves garlic, crushed
  • Maldon sea salt

Method

  1. Mix the flour, yeast, celery salt and cheese in a bowl. Add 3 tbsp of the oil and about 325ml of hand-hot water. Mix to a soft, but not too sticky, dough. Turn out onto a lightly floured surface and knead for about 10 minutes, until smooth and elastic. Put in a lightly oiled bowl, cover with clingfilm and leave to rise in a warm place for about 1 hour until the dough has doubled in size.
  2. To make the filling, heat another 3 tbsp of the oil in a large frying pan and stir in the onions and caster sugar. Fry for about 15 minutes, turning frequently, until they’re soft and lightly caramelised. Chop the thyme and add to the pan with the garlic and plenty of black pepper. Cook, stirring, for a couple of minutes. Spread over a baking sheet to cool.
  3. Grease a large baking sheet. Punch the risen dough to deflate it and turn out onto a floured surface. Divide into three. Roll each piece into a long, thin strip, measuring about 35 x 10cm. Spoon the filling down each strip to within 1cm of the edges. Lightly dampen one long side of each strip and bring the sides up over the filling, pinching the dough firmly together. Turn the strips over so the joins are underneath.
  4. Starting from the centre, braid the three strips loosely together, working towards one end. Pinch the ends together firmly. Braid the other half in the same way. Lift onto the baking sheet, tucking the ends underneath. Cover loosely with oiled clingfilm and leave to rise in a warm place for 40-50 minutes until doubled in size. Preheat the oven to 220°C, gas mark 7.
  5. Drizzle the dough with the remaining 1 tbsp oil and scatter generously with salt. Bake for 30 minutes until golden. Scatter with plenty of thyme sprigs and bake for a further 2-3 minutes. Transfer to a wire rack to cool.